

How to Glaze Ceramic Bisque Pieces: Step-by-Step
Last Updated: October 22, 2026
Quick Summary
To glaze ceramic bisque, clean the piece by brushing off dust and wiping with a barely damp sponge, then apply two to three thin coats of a glaze rated for the same cone as your clay body. Wipe the foot ring clean and fire to cone 04 to cone 06 for most low-fire hobby work.
- Never rinse bisque under running water, because a damp piece can explode in the kiln.
- The glaze and clay body cone ratings must match, or the glaze will not melt properly.
- Brush glaze in thin, even coats and let each coat dry before adding the next.
- Wipe at least a quarter inch up from the bottom to keep glaze off the kiln shelf.
- Keep glazed pieces at least a half inch apart when loading the kiln.
Table of Contents
- How to Clean Bisque Before Glazing
- Choosing a Glaze That Fits Your Clay Body and Firing Temperature
- How to Glaze Ceramic Bisque by Brushing
- Dipping vs Brushing Glaze Techniques
- Underglaze vs Glaze for Bisque
- Glaze Thickness, Coat Count, and Wiping the Foot Ring
- Troubleshooting Glaze Crawling and Pinholing
- Kiln Loading, Shelf Protection, and Firing Schedule
- Frequently Asked Questions
How to Clean Bisque Before Glazing
Learning how to glaze ceramic bisque pieces starts with one unglamorous truth: dust is the enemy. At Backwoods Ceramics and Molds, we tell every new potter the same thing.
Bisque ware is unglazed pottery that has been fired once to remove water and harden the clay. That first firing leaves a porous, chalky surface. It grabs glaze well, but it also grabs every speck of dust in your studio.
Dust Removal and Surface Preparation
Start with a soft brush. A clean paintbrush or makeup brush works fine. Brush the whole piece, inside and out, over a trash can.
Next, wipe the surface with a barely damp sponge. Then let the piece dry completely before you touch it again.
Here is a checklist we use:
- Brush off loose dust with a soft brush
- Wipe with a damp sponge, not a wet one
- Check the foot ring for clay crumbs
A common mistake is handling bisque with lotion or oil on your hands. Glaze will not stick to oily spots.
Choosing a Glaze That Fits Your Clay Body and Firing Temperature
The right glaze is the one that matures at the same temperature your clay was fired to. Most hobby ceramics in the United States are low-fire clay bodies, fired around cone 04 to cone 06. If you use a high-fire glaze on low-fire clay, it will not melt properly.
Check two things before you buy any glaze:
- The cone rating on the glaze jar
- The cone rating of your clay body
They must match. A glaze rated for cone 6 will stay rough and unmelted at cone 04.
How to Read a Glaze Label
A commercial glaze label usually lists four things you need: the cone range, the firing atmosphere it was designed for (oxidation or reduction), whether it is labeled food safe, and any special notes such as "brush on" or "dipping." The cone range is the most important.
If the label gives a range, fire to the middle or upper end of that range for the most reliable melt. Firing at the very bottom of a glaze's range often leaves it underfired and rough.
What Happens When the Cone Is Wrong
Underfiring a glaze, firing below its rated cone, leaves it immature. The surface stays rough, matte, and porous, and it may not be food safe even if the label says it is, because the glass has not fully formed.
A common pattern is a potter who buys a beautiful cone 6 glaze, fires it at cone 04 on a low-fire clay body, and wonders why the piece looks like sandpaper.
Matching Glaze to Clay Body
Your clay body has its own cone rating, usually printed on the bag or the supplier's listing. Low-fire clay bodies mature around cone 06-04. Mid-fire bodies mature around cone 5-6.
Our 2 gallon Low Fire Standard Slip is a bright white firing slip that works well with most commercial glazes and underglazes. It fires at cone 04 with 5% shrinkage and 17% absorption.

Test Before You Commit
Always test before you commit to a full piece. Brush a small sample tile of the same clay body, fire it on the same schedule you plan to use, and inspect the result. You will see the true color and finish, not the color on the lid. Check for crawling, pinholing, and whether the surface looks glossy and fully melted.
How to Glaze Ceramic Bisque by Brushing
Brushing is the friendliest method for beginners and for detailed pieces. Load your brush, then apply glaze in thin, even strokes.
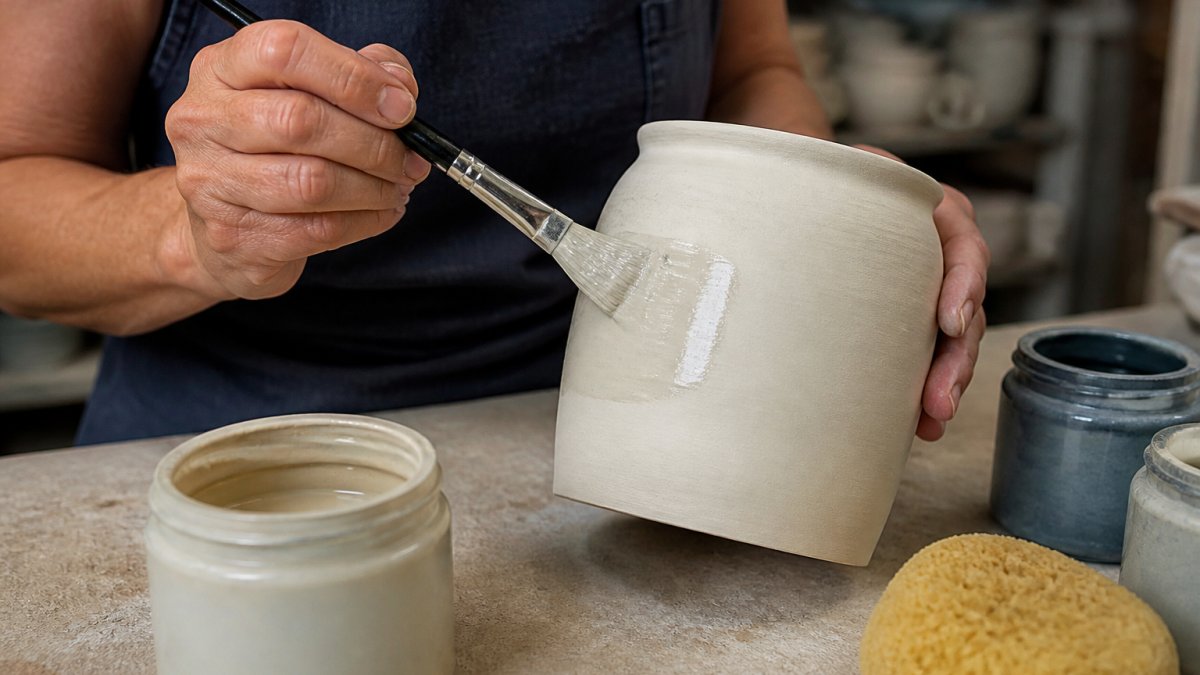
Follow these steps:
- Stir the glaze well. It settles fast.
- Load the brush, but do not soak it.
- Brush in one direction, then crosshatch the next coat.
- Keep the coat thin and even.
- Let each coat dry before adding the next.
Brushing suits textured pottery because the bristles push glaze into the surface texture. It also gives you control near the foot ring.
The downside? Brush marks. If your glaze is thick, strokes stay visible after firing. Thin the glaze slightly and use a soft brush to reduce them.
Dipping vs Brushing Glaze Techniques
Dipping gives the most even coverage, but it needs a big bucket of glaze. Brushing is slower but uses less glaze and suits small or detailed pieces.
| Technique | Best For | Coverage | Glaze Used | Skill Level |
|---|---|---|---|---|
| Brushing | Detailed, textured pieces | Good, may show strokes | Low | Beginner |
| Dipping | Simple, smooth shapes | Very even | High | Intermediate |
| Pouring | Large or awkward pieces | Even on one side | Medium | Intermediate |
For dipping, hold the piece with tongs and dip in one smooth motion. Count to three, then lift. A quick, confident dip beats a slow one that builds a thick, uneven layer.
2 gallon Low Fire Standard Slip (by the box) - No Shipping →
Pouring Glaze for Large or Awkward Pieces
Some pieces are too big to dip and too fiddly to brush. Pouring solves that. Set the piece on a rack over a bucket, then pour glaze over the outside in a steady stream.
Rotate the piece as you pour. Catch the runoff and reuse it. Pour the inside last, swirl, and dump the excess back into the bucket.
Underglaze vs Glaze for Bisque
Underglaze is a colored decoration that goes on bisque before the glaze.
Think of it this way. Underglaze adds color and detail. Glaze adds shine, depth, and a food-safe surface.
Use underglaze when you want:
- Fine painted details
- Colors that stay where you put them
- Designs under a clear glaze
Use glaze alone when you want a solid color with a glossy or matte finish.
Let underglaze dry fully before glazing. If it is still damp, the clear glaze will smear it.
Glaze Thickness, Coat Count, and Wiping the Foot Ring
Glaze thickness decides your final result more than any other factor. Too thin, and the piece looks dry and patchy.
Aim for two to three thin coats. Each coat should dry before the next. Thickness should look like a light dusting, not a wet puddle.
Then wipe the foot ring. Use a damp sponge to clear glaze from the bottom of the piece.
- Two to three thin coats applied
- Each coat fully dry
- Foot ring wiped clean
- Bottom checked for stray glaze
Troubleshooting Glaze Crawling and Pinholing
Crawling looks like bare patches where the glaze pulled away. Pinholing shows as tiny craters in the finished surface.
Crawling usually comes from dust or oil on the bisque. The glaze cannot bond, so it pulls back.
Pinholing comes from trapped gas or glaze that is too thick.
Other common defects:
- Running: glaze too thick near the base. Wipe more.
- Shivering: glaze and clay do not fit. Test a new glaze on a tile first.
- Bubbles: glaze applied too fast. Slow down and let coats settle.
If a fired piece has a small crawl, you can often touch it up and refire.
Kiln Loading, Shelf Protection, and Firing Schedule
Kiln loading protects both your piece and your shelves. Place glazed pieces so they do not touch each other. Leave at least a half inch of space between glazed pieces, and more if the glaze is known to run. Glaze expands and moves during firing, and two pieces that touch at the start can fuse together by the end.
Shelf Protection Methods
Use kiln wash or stilts under glazed pieces. Kiln wash is a refractory coating painted onto the shelf that prevents glaze drips from fusing to the surface. Apply two thin coats, let them dry, and reapply when the coating wears thin.
For pieces with heavy glaze near the base, set them on a cookie, a thin fired clay disc, rather than directly on the shelf.
Spacing and Loading Rules
- Keep glazed pieces at least a half inch apart.
- Do not let a glazed piece touch an unglazed piece; glaze can fuse to bare clay.
- Leave the top peephole and any kiln vent clear.
- Place taller pieces toward the edges and shorter pieces in the center for even heat.
Firing Schedule for Low-Fire Work
Keep this firing schedule in mind for low-fire work:
| Stage | What Happens | Why It Matters |
|---|---|---|
| Slow start | Kiln warms gently | Lets trapped gas escape |
| Hold at peak | Glaze melts and smooths | Builds an even finish |
| Controlled cool | Kiln drops slowly | Prevents cracks and dunting |
Fire to the cone your glaze and clay both call for. For most hobby work, that is cone 04 to cone 06. Check your kiln manual for the exact schedule. A slow start, often a two- to three-hour ramp to low red heat, gives trapped gas and moisture time to escape before the glaze seals over. A hold at peak of ten to twenty minutes lets the glaze smooth out.
Food Safety and Functional Ware
One last word on food safety. Glazed functional ware should use glazes labeled food safe, and the glaze must be fully melted. If a surface is rough, matte, or crazed, treat it as decorative only. Crazing, a network of fine cracks in the glaze, can harbor bacteria, and a matte or rough surface may not be fully sealed. When in doubt, consult the glaze manufacturer's guidance and your own fired test tiles.
Frequently Asked Questions
How many coats of glaze should you apply to ceramic bisque?
Most commercial glazes call for two to three coats, applied thinly and allowed to dry between layers. Brushing three light coats generally gives more even coverage than one thick coat, which can run or crack during firing. Dipping usually achieves full coverage in a single dip. Always check the glaze label for the manufacturer's recommended coat count, since thickness affects color, finish, and whether the glaze crawls.
Do you need to wash bisque before glazing?
You do not need to soak bisque in water, but you should remove dust before glazing. Wipe the surface with a damp sponge or a soft brush to lift loose clay particles, then let the piece dry completely. Dust left on the surface prevents glaze from bonding and causes crawling or bare patches. Avoid handling the piece with oily fingers after cleaning, since oils also interfere with glaze adhesion.
What is the difference between dipping and brushing glaze on bisque?
Dipping submerges the piece in a bucket of glaze, giving a fast, even coat across the whole surface, which suits simple shapes and production runs. Brushing applies glaze with a brush, giving more control on textured pottery, detailed pieces, and areas where you want to blend colors. Many potters brush glaze onto the inside and dip the outside. Both methods require wiping glaze off the foot ring before firing.
How do you prevent glaze crawling on bisque pieces?
Crawling happens when glaze pulls away from the clay during firing, usually because of dust, oil, or too-thick application. Clean the bisque thoroughly, apply thin, even coats, and avoid piling glaze into corners or recessed areas. Make sure the glaze is rated for your clay body and firing temperature. If crawling persists, sieve the glaze and check that it has not thickened or settled unevenly in the bucket.